11 DIY Cat Toys You Can Make Today (With Pictures)
Cats need toys for enrichment and to stimulate their natural instincts. A bored cat can end up developing destructive and unwanted behaviors.
However, cat toys can be expensive, and it’s common for them to get lost or ripped up pretty easily as your cat chases them around in tight spaces and underneath furniture. If you find yourself constantly replacing cat toys, you can make your own toys to save on costs.
We’ve created a list of very simple yet entertaining DIY cat toys. Your time is precious, so you can complete these crafts pretty quickly and spend more time playing with your cat.
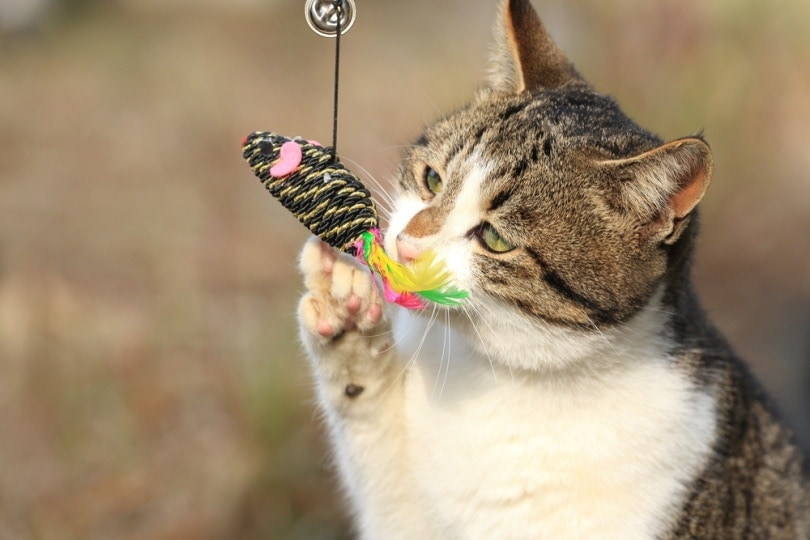
The next time you finish a bottle of wine, you can save the cork and use it to make a toy. You can customize this toy and get creative with different kinds of materials to draw your cat’s attention. You can also attach a long piece of string to it so that it becomes an enticing wand toy. The possibilities are endless, and these toys will provide endless hours of entertainment for your cat.
Materials
Wine corks
Trimmings (feathers, string, ribbon, etc.)
Epoxy
Knife
Scissors
Instructions
Boil the wine corks in water to remove leftover wine and soften the cork.
Use a knife to poke a 1-inch hole that’s wide enough to fit your trimmings.
Let the cork dry.
Twist the ends of the trimmings so that they fit inside the hole.
Add epoxy into the hole and roll the ends in epoxy and stick them inside the hole. Make sure the hole doesn’t have any air pockets or gaps inside.
Wait for the toy to completely dry before letting your cat play with it.
2. Paper Towel Roll Toys
Paper towel rolls are the perfect size for your cat to paw at and pounce on. You can get really creative by taking a plain paper towel roll and attaching some fun features to it. Some materials you can use are bells, pompoms, and crinkly paper.
You can even dab some wet cat food or treats inside the roll to entice your cat, and you won’t have to feel so bad about tossing it out because a new roll is sure to appear again.
Materials
Paper towel or toilet paper rolls
String
Trimmings (feather, bells, pompoms, etc.)
Hot glue gun
Scissors
Instructions
Use scissors to poke holes in the paper towel roll. Slip string through the holes and use the string to tie feathers, bells, and other items.
Use the hot glue gun to attach pompoms and other trimmings directly to the paper towel roll.
Wait for the glue to dry completely before letting your cat play with the toy.
Dab wet cat food or place treats inside the roll. For an added challenge, you can stuff the roll with paper for your cat to dig through to find the treats.
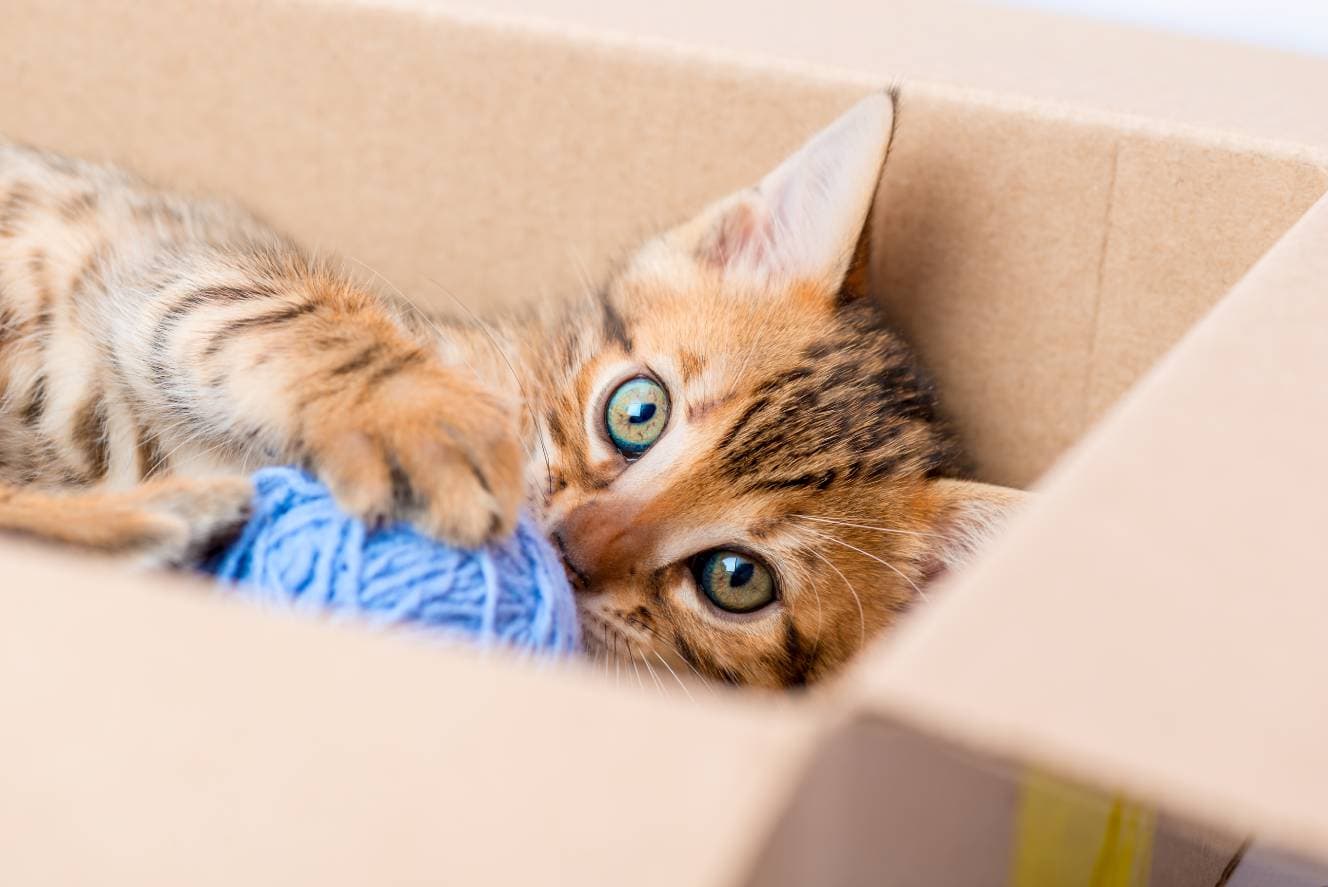
If your cat likes sticking its paws into things, it’ll love this fun puzzle toy. All you need is a shallow box, some treats, and some small toys. It’s also very customizable so you can switch up the items if your cat gets bored.
This toy will engage your cat’s stalking and pouncing instincts and can provide a lot of fun and entertainment for your cat. It’ll also be fun for you to watch as your cat attempts to get all the toys and treats out of the box.
Materials
Shallow cardboard box
Small toys (balls, mouse toys, etc.)
Scissors
Instructions
Cut holes on all sides of the cardboard box except the bottom side. You’ll want to cut enough holes so that the toys inside are very visible but not too many so that your cat can easily get to the toys. The holes should also be big enough for your cat’s paws to go through safely.
Place your cat’s favorite toys inside the box and use some treats to encourage your cat to investigate. You can also sprinkle catnip on the box and inside the box to entice your cat.
If you have a sock that’s lost its mate, it can be the perfect toy for your cat. All you need is some stuffing, catnip, and a needle and thread to make the basic form of this toy. With all DIY toys, you can definitely add your own creative flair to the toy. Some other accessories that you can attach to the toy are buttons, yarn, and bells. You’ll have a toy that’s ready in no time to entertain your cat.
Materials
Socks
Plush stuffing
Needle and thread
Catnip
Accessories (Buttons, yarn, bells, etc.)
Instructions
Stuff the sock with plush stuffing and a small amount of catnip.
Sew on accessories to the sock.
Sew the sock shut and make sure there aren’t any loose threads.
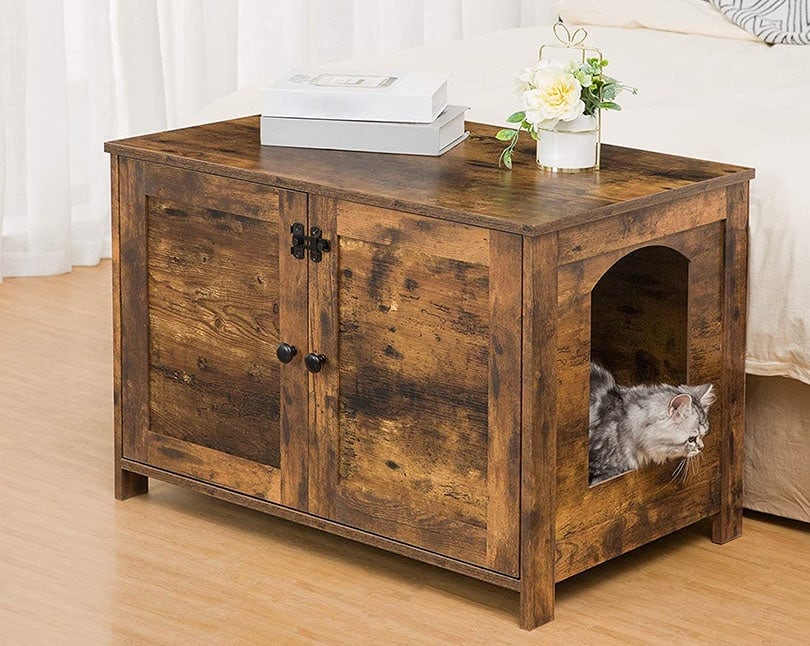
A simple cube shelf can become a fun and cozy apartment for your cat. All you need is a pillow or mat that fits inside the cubes and some sisal rope. You can add personal touches by dyeing the sisal a different color, using pillows with fun patterns and designs, or painting the cube with nontoxic paint.
If the shelf has multiple levels, you can use a wooden board and wrap it in sisal and lean it against the shelf as a ramp. You can spend a day configuring the cube shelf, so it contains all your cat’s favorite things.
Materials
Cube shelf
Pillows or padded mats
Sisal
Yarn
Pompoms
Quick-drying super glue
Hammer and nails
Instructions
The most challenging part of this craft is making the scratching post. Start by taking one end of the sisal and applying the quick-drying super glue that covers about an inch of the rope.
Once the glue dries completely, nail the glued end of the sisal to the base of one of the sides of the cube.
Tightly wrap the sisal around the side of the cube. If you run out of sisal, use the quick-drying super glue on the end of the sisal and nail down the sisal after the glue dries.
Keep wrapping the sisal until one side of the cube is completely covered.
Add cushions to some of the compartments.
Tie yarn to pompoms to create swatting toys and glue them to the top of the compartments.
6. DIY Cat Box With Scratching Post
A simple cube shelf can become a fun and cozy apartment for your cat. All you need is a pillow or mat that fits inside the cubes and some sisal rope. You can add personal touches by dyeing the sisal a different color, using pillows with fun patterns and designs, or painting the cube with nontoxic paint.
If the shelf has multiple levels, you can use a wooden board and wrap it in sisal and lean it against the shelf as a ramp. You can spend a day configuring the cube shelf, so it contains all your cat’s favorite things.
Materials
Cube shelf
Pillows or padded mats
Sisal
Yarn
Pompoms
Quick-drying super glue
Hammer and nails
Instructions
The most challenging part of this craft is making the scratching post. Start by taking one end of the sisal and applying the quick-drying super glue that covers about an inch of the rope.
Once the glue dries completely, nail the glued end of the sisal to the base of one of the sides of the cube.
Tightly wrap the sisal around the side of the cube. If you run out of sisal, use the quick-drying super glue on the end of the sisal and nail down the sisal after the glue dries.
Keep wrapping the sisal until one side of the cube is completely covered.
Add cushions to some of the compartments.
Tie yarn to pompoms to create swatting toys and glue them to the top of the compartments.
Super energetic cats can end up breaking multiple wand toys. If you’ve gone through several wand toys, this toy is an affordable option that you can use to keep your cat entertained. You can make different kinds of designs and attach multiple strands of yarn to create a cat wand with many attachments for your cat to chase.
With all the different creations you can make, your cat will stay interested and have endless hours of fun stalking, chasing, and pouncing on these toys.
Materials
Chopstick or skewer (shaved off sharp end)
Yarn
Hot glue gun
Beads
Feathers
Bells
Instructions
Tie yarn of any length to the end of a chopstick or skewer. Cover the knot with hot glue to reinforce its placement.
String beads and bells on the yarn.
Tie feathers to the other end of the yarn and use hot glue to keep them in place.
Wait for the glue to dry completely before playing with your cat.
If your cat likes cozy, dim places, you can make as many DIY cat tents as you want and place them all throughout your home. This project doesn’t require any fancy equipment, and it uses materials that you’ll probably already have in your house. All you need is duct tape, a cardboard base, wire coat hangers, and an old t-shirt.
This project is so easy and fun to make that you might start looking for patterns that your cat would like the next time you’re shopping for a new shirt.
Materials
Duct tape
Cardboard base large enough for your cat
Two coat hangers
Pliers or wire cutters
T-shirt
Instructions
Cut off the twisted end and hook of both coat hangers.
Reshape the coat hangers so that they become half circles.
Crisscross the coat hangers and tape the middle where the wires intersect. The end result should look like the framework of a tent.
Poke holes in the corners of the cardboard.
Insert about an inch of each end of the coat hangers into the hole.
Bend the ends of the coat hangers so that they lie flat against the cardboard. Tape down the bent ends to keep the coat hangers securely in place.
Pull the shirt over the tent frame and let the neck hole rest on one side of the frame where your cat can easily step in and out of it.
Gather the other ends of the shirt at the bottom of the base and tape them down.
For additional comfort, stuff a small pillow or cushion inside the tent.
9. DIY Pompoms
If your cat’s a swatter, you can provide endless fun by creating a ton of pompoms with this easy craft. All you need is yarn and a fork. Once you learn how to make these pompoms, you can use wider objects like a thick piece of cardboard to create pompoms of different sizes.
For even more fun, you can sprinkle some catnip on these pompoms and hide them all throughout the house for your cat to hunt down.
Materials
Yarn
Fork
Scissors
Instructions
Wrap the yarn around the prong-end of the fork. Wrap the yarn around the fork about 60 times and try your best not to cause uneven overlapping with the yarn.
Loop another piece of yarn through the holes between the prongs so that you can tie the yarn around the entire middle of the wrapped yarn. Tie the yarn around the wrapped yarn tightly and double-knot it.
Slide the yarn off of the fork.
Cut both looped ends of the wrapped yarn. The strands should unfurl to create a pompom. Trim the yarn to create an even sphere.
Let your cat play with the pompom as is or sprinkle some catnip before giving it to your cat.
10. T-Shirt Cat Toy
Image Credit: Kosmos111, Shutterstock
Transform your old t-shirts into new cat toys with this easy craft. All you need to do is cut a t-shirt into strips. You can then tie knots or braid the strips to create a fun toy for your cat to chase around. The crevices created by the knots can also be the perfect pockets to slip in some catnip. Since you can create many toys with just one t-shirt, this craft is a great way to make multiple gifts for your cat parent friends.
Materials
T-shirt
Scissors
Instructions
Cut your t-shirt into strips that are at least 6 inches long and an inch wide.
Layer three or four strips on top of each other and tie a tight knot in the middle.
If you want to create a braid, just create longer and thinner strips and tie them together at one end.
Start braiding until you run out of room and tie off the braid with a tight knot.
If you want to give these toys as gifts or party favors, use different colored strips and make sure to remove any frays for a cleaner presentation.
11. Felt Treat Pockets
If your cat’s a treat fiend, it’ll enjoy this challenging and enriching toy. All you need is some felt and a needle and thread. Fortunately, your cat won’t care too much about your sewing skills, so you don’t have to be an expert in order to make this toy. If you want to be extra creative, you can make different patterns and shapes. If your cat’s really good at picking treats from these pockets, you can change up the size of the holes to create a greater challenge.
Materials
Felt
Needle and thread
Instructions
Fold over a sheet of felt and trace out any shape.
Cut the shape out of the felt. You should end up with two identical pieces of felt.
Sew the two pieces of felt together, but make sure to leave one side open so that you can insert treats.
Tie off the thread and make sure to cut and hide loose ends.
Insert your cat’s favorite treats or some kibble into the pocket to encourage your cat to investigate.
Conclusion
DIY cat toys don’t have to be complicated projects to produce fun and entertaining results for your cat. Everyday household items can be recycled and repurposed to create brand-new toys for your cat. The crafts that we’ve provided are some of the easiest toys to make, and they also leave room for you to add your personal touches.
When you invest a little time making your own cat toys, you can end up providing hours of fun for your cat. Giving your cat toys and playing with your cat can significantly increase the bond you share. We hope you and your cat enjoy many entertaining moments and make special memories while playing with these toys.
Nicole is a lover of animals of all sizes but is especially fascinated with the feline variety. She’s the proud mom of Baby, a Burmese, and works every day so he can relax in the sunshine or by the fire. She’s always had a cat in her home and has spent countless days with others, observing behaviors and softening up even the grouchiest of the lot. Nicole wants to share her kitty expertise with you so you and your cat can live happy, healthy, and care-free.